How to Measure Luggage for Your Brand
To measure luggage, include the wheels, the retracted trolley handle, folded carry handles and any front pocket that still projects when closed. Measure the complete case at its outermost points to establish its overall height, width and depth.
For a custom order, define the target dimensions and packing requirements first. Then review the shell, wheels, trolley and front pocket together. Once the sample is assembled, use one measurement method and record the results in the specification and sample approval. Design, purchasing, production and sales can then work from the same dimensions.
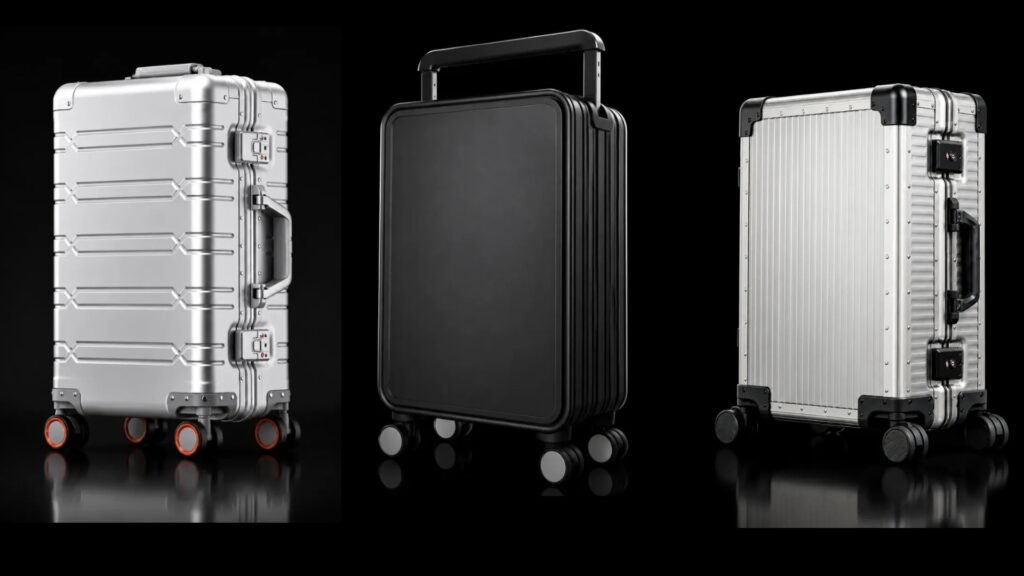
Our TS-003 front-pocket model and TS-005 wide-handle model are both listed as 20-inch cases, but they use different structures and fittings. Check the overall dimensions of each selected configuration rather than treating the size name as proof that the cases are equally large.
What size does your product need to be?
“A 20-inch carry-on” is a useful starting point for model selection, but it does not fully define the product. The target market, business or everyday use, and the items the customer needs to carry all influence the case shape and interior.
If the case must meet a particular airline allowance or fit a specified baggage sizer, establish the maximum height, width and depth first. Identify any total linear dimension or weight requirement as well. Compare the complete case, including wheels and parts that project when stowed. Do not use the entire height allowance for the shell and add wheels and handles afterward.
If the priority is carrying a laptop, documents or equipment, also provide the items’ width, height and thickness. Include a protective sleeve, document folder or fitted insert where required. A suitable exterior size does not establish interior fit: trolley channels, wheel wells, the frame and dividers can occupy packing space.
We first compare those requirements with existing case designs. Changing lining, dividers or pocket layout involves different work from changing shell dimensions. If the existing structure cannot meet the brief, we review the case proportions, hardware mounting and tooling changes together. Agreeing which functions must stay gives the size decisions a clear basis.
How do you measure height, width and depth?
For the base measurement, place the sample on a flat, hard floor. Close the lid, zippers and latches, fully retract the trolley and put carry handles in their normal stowed positions. Record the empty-case condition first. For pockets, soft compartments or expandable designs, measure any agreed loaded or expanded conditions separately.
Measure straight distances. Do not run the tape around a curved corner, shell rib or bulging pocket, and do not force handles or soft pockets down to get a smaller reading. Imagine a rectangular box that just contains the complete case. Straight, flat boards can help locate the outermost points and the distance between opposite faces.
Height: from the floor to the highest point when stowed
Stand the case upright and measure from the floor beneath the wheels to its highest point. That point may be a carry handle, trolley grip, mounting housing or the shell itself. Check the assembled sample. A level board lightly touching the highest point makes it easier to measure the vertical distance from the floor to the board’s underside.
This measurement already includes the wheels and wheel housings. Do not add the wheel diameter again. You can record the extended trolley height separately for the handling discussion, but identify its starting point and keep it separate from the stowed overall height.
Width: include everything that projects on either side
Viewed from the front, measure between the leftmost and rightmost points. Include side carry handles, feet, corner guards, locks or wheel assemblies wherever they extend beyond the shell.
The widest points may be at different heights. Measuring only across a narrow middle section can miss a handle higher up or wheels below. Place two upright, parallel boards lightly against the outermost points and measure the space between their inside faces.
Depth: from the foremost point to the rearmost point
Depth is the space the case occupies from front to back. Include the front pocket, raised panels and trolley mounting structure at the rear. Use two upright, parallel boards to locate the extreme points, touching the case lightly without compressing a soft pocket.
For an external pocket, state whether the depth was measured with the pocket empty and closed or with agreed contents inside. If you lay the case down to measure it, check that projecting rear fittings have not tilted it and changed the reading.
How do wheels and handles affect the finished size?
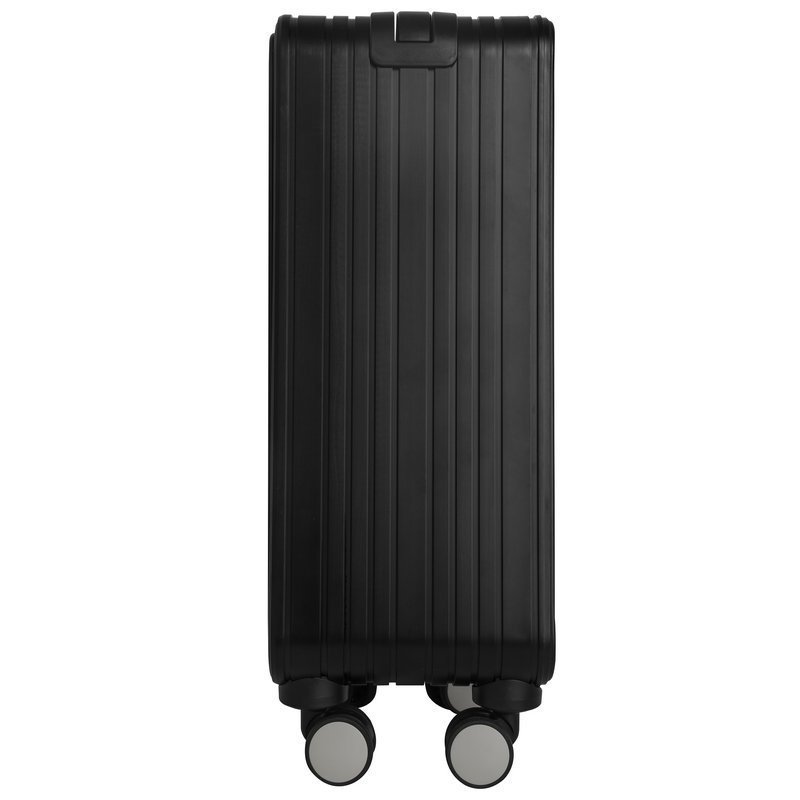
Wheels, wheel housings and trolley mounts can all change the outermost points. Compare the assembled dimensions and usable interior when selecting fittings.
Both TS-003 and TS-005 use four twin-wheel spinner assemblies. Check how much height the wheel system adds and whether any part extends to the sides or rear. The wheel and housing positions change as a spinner turns. Include parts that project beyond the shell within normal rotation when measuring that direction, and retain the measuring position in the sample record.
If a customer wants larger wheels, do not simply add the diameter increase to the existing case height. The finished change depends on the housing, mounting position and the part of the wheel below the body. A lower housing also needs enough space for mounting and rotation. Reducing height should not prevent the wheel system from turning normally.
If the overall height is fixed, a taller wheel system may require changes to the shell or mounting structure. Review the interior space, case proportions and operating clearance together rather than shortening the shell and leaving everything else unchanged.
Our TS-005 wide-handle aluminum carry-on is also useful for discussing the back and interior layout. Its wide telescopic trolley spans the case back. Check the grip in its retracted position, the mounting structures on both sides and whether any of these parts extend beyond the other components.
For a different trolley, review its stowed shape, mounting position and internal channels. Grip width, extended working height and overall case dimensions are separate measurements. Our luggage handle selection guide can help define the handling requirements before reviewing how the selected system mounts on the case.
How much space does a front pocket need?
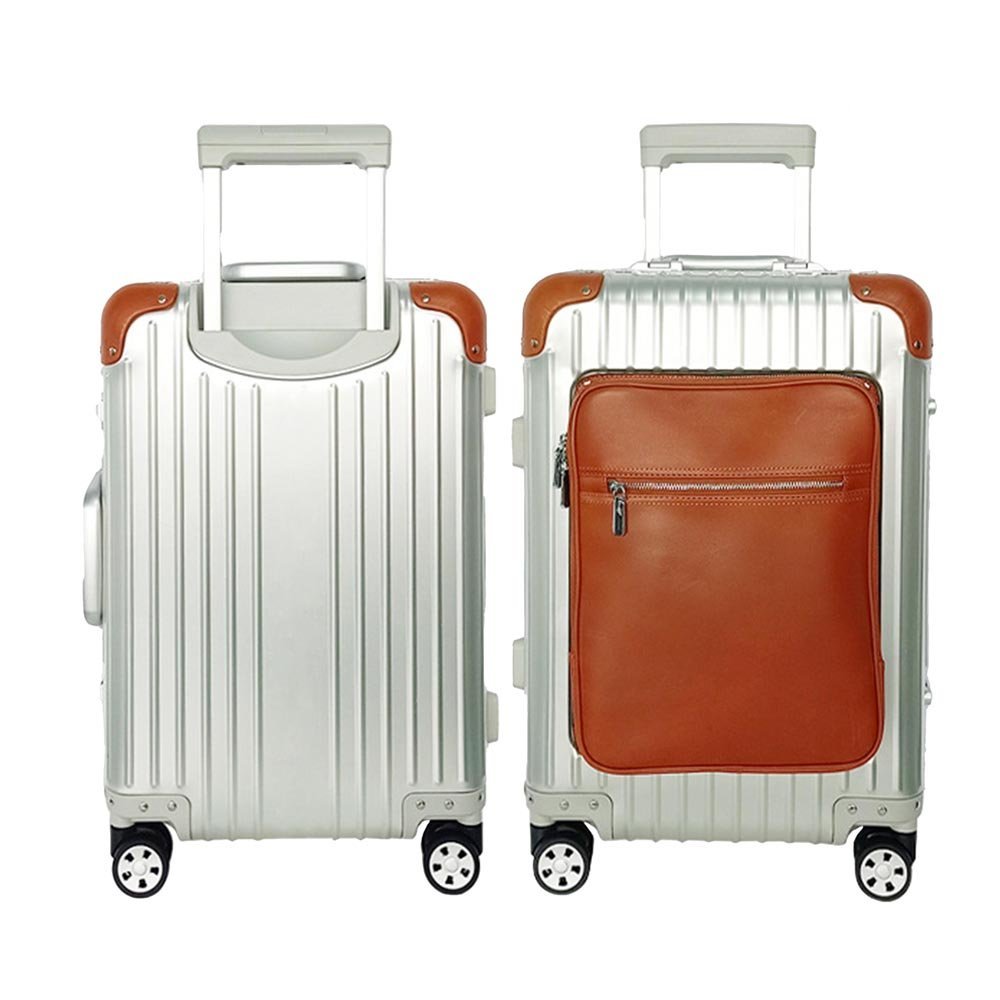
Our TS-003 front-pocket aluminum carry-on has a separate zippered leather pocket outside the metal main case. Documents or a device can be reached while the main case stays closed. Plan the main body depth and the space occupied by the front pocket together.
Start with the contents. Record the laptop’s physical width, height and thickness, including its sleeve if one will be used. State whether a folder, charger or other items need to share the pocket. A screen’s diagonal size does not replace those measurements.
Then check how the items pass through the opening. On the sample, check entry clearance, whether the zipper or seams obstruct the corners, and whether the pocket closes naturally. External pocket thickness is not the same as usable internal thickness: lining, binding and dividers also occupy space.
If the brief calls for a slim, flat pocket that holds a laptop, folder and charger together, check that actual combination. If the pocket bulges noticeably, compare a larger pocket, revised divisions or moving some accessories to the main compartment. Enlarging the pocket may increase total depth. Reducing the contents or changing the layout must still satisfy the intended use.
Record pocket depth both empty and closed and with the agreed contents, identify those contents and take front and side photographs. Decide which condition the published dimensions describe, and make the product instructions consistent with it. An empty pocket’s flat appearance should not represent its loaded thickness.
Which dimensions belong on the specification sheet?
The brand, factory and freight provider all use dimensions, but they measure different objects. Use full field names so one “size” entry does not stand for the shell, complete case, interior and packaging.
| Record | What it measures | What it helps decide |
|---|---|---|
| Shell or structural dimensions | The shell, frame or other reference points defined on the drawing | Structure, tooling and assembly |
| Overall finished dimensions | Maximum height, width and depth with wheels fitted and handles stowed; pocket condition stated | Product listings, size requirements and finished-case inspection |
| Usable interior space | The space available after wheel wells, trolley channels, lining and dividers | Laptop, document, equipment and insert fit |
| Outer packaging dimensions | The sealed shipping carton with the agreed protective packaging inside | Warehousing, transport and freight quotations |
Multiplying overall height, width and depth gives the volume of the enclosing rectangular box, not the packing capacity. Corners, the frame, wheel wells, trolley channels and lining affect the interior. Agree on a separate capacity measurement method if the brand needs a liter figure.
For total linear dimensions, add overall height + width + depth. One inch equals 2.54 centimeters. Retain the original readings and convert them consistently so independently rounded inch and centimeter figures do not conflict.
If a requirement limits each side, check each side. If it also limits the total, check the sum separately. A shorter side does not cancel out a side that exceeds its own limit. Assess airline or channel requirements against the applicable conditions rather than relying on the “20-inch” name.
What should you approve on the sample?
First check that the sample uses the wheels, trolley, carry handles, pocket and interior being submitted for approval. Matching readings do not make two samples equivalent if their parts or revisions differ.
Retain the measuring condition and endpoints together. Mark height and width on a front photograph and depth on a side photograph. Add a detail photograph where a component creates the highest or widest point. The pictures identify where the measurement was taken; the recorded readings establish the result. Both must refer to the same sample revision.
A record that can support production should include:
- Sample identification: model, size name, revision and date.
- Actual configuration: the wheels, trolley, carry handles, front pocket and relevant parts.
- Measuring condition: empty or agreed load, pocket contents, handle positions and wheel orientation.
- Results and requirements: measured height, width and depth, units, corresponding photographs and agreed tolerances or maximum permitted dimensions.
Distinguish the maximum permitted size from the production tolerance. A nominal dimension with a tolerance does not by itself define a “must not exceed” external limit. If the product must fit a fixed space, list that limit separately and allow for components, assembly and measurement variation in the design. Do not put the sample exactly at the limit and then add the production tolerance beyond it.
If the two sides obtain different readings, compare the method and condition first. Did both measure height from the floor? Were side handles included? Was the pocket loaded? Were the wheels oriented the same way? Did a board tilt or compress a soft pocket? After ruling these out, inspect the sample, fittings and assembly differences.
After approval, keep drawings, component lists, dimension records and sample revisions aligned. If wheel housings, trolley, handles or pocket structure change, identify the affected directions, remeasure and update the record. Product listings and packaging information should also use the final approved data.
How do we develop a case around your target size?
At the start, provide the target market, maximum overall dimensions, main contents and functions you want to retain. That is more useful than a size name alone. With a reference case, identify the features you like: front-pocket access, the wide trolley, case proportions or an internal document layout.
For a front-pocket design such as TS-003, we review the opening, divisions, loaded appearance and total depth around the device and document requirements. For a wide-trolley design such as TS-005, we review the stowed trolley, mounting structure, internal channels and wheels together, then identify what stays and what needs adjustment.
If the target is close to an existing structure, start by comparing fittings and layout changes. If the shell dimensions or proportions must change, review structure, tooling, usable space and development work together. The brand can see what each adjustment achieves and decide which functions are worth retaining.
Bring the size requirements into the design, resolve fittings and layout on the sample, and use measured results to approve the final configuration. For a range of sizes, see our luggage collection size planning guide. If you already have target dimensions and references, use our custom luggage options to discuss whether the project starts with an existing case or needs new structural development.
Tell us about your luggage project
Share your preferred model, quantity and customization requirements.