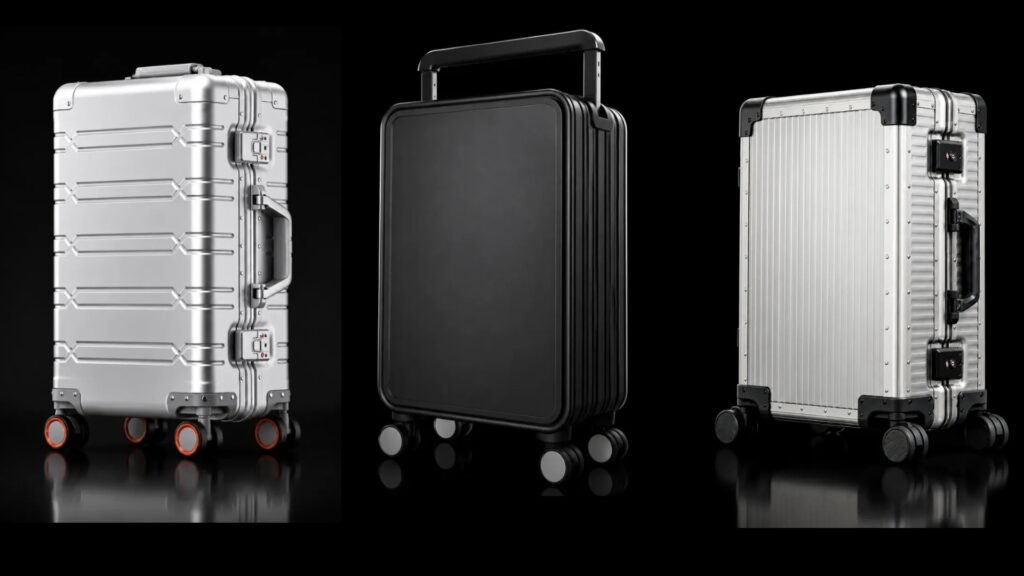
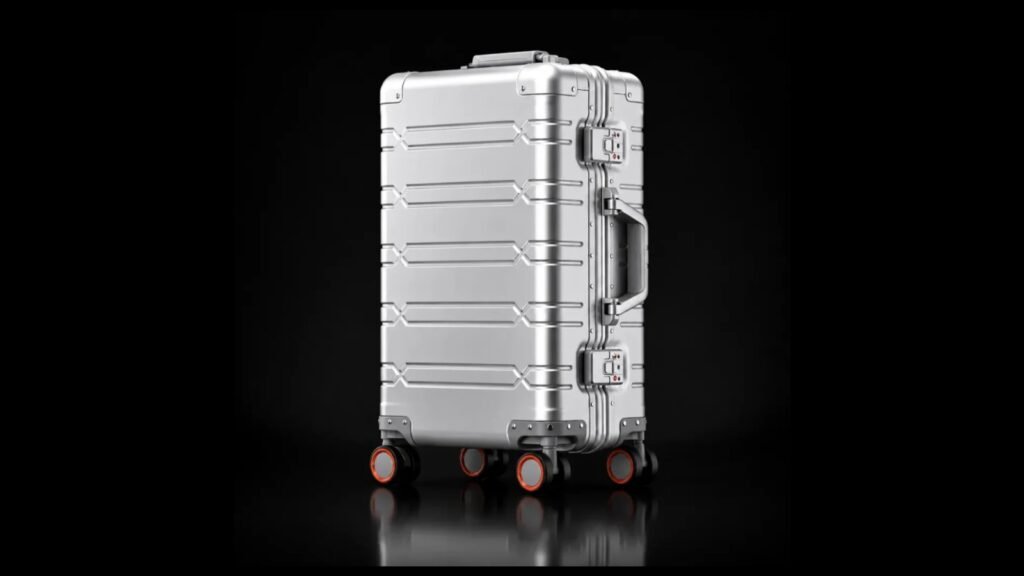
Aluminum vs Titanium Luggage: How to Choose for Your Brand
For a metal luggage collection in several sizes, first review whether an existing aluminum model meets the brief. If a genuine titanium-alloy shell defines the product, start with a titanium model. In either case, compare finished weight, usable space, opening, hardware, and budget. The right choice needs to suit both the product’s position in your range and its intended use.
You might like the color of a titanium suitcase without requiring a titanium shell. In that case, begin with the finish you want. If the shell itself must be titanium alloy, begin with that material requirement and a suitable case. The two requests sound similar, but they can lead to different products, development work, and quotations.
Here is how to compare the options using our existing models, decide which requirements matter most, and turn the chosen direction into a sample.
Start with the customer who will use the case
Tell us what you want to sell: a business case for frequent work trips, a metal model within your main collection, or a product built around its titanium shell. Add your intended selling price, case size, empty-weight target, and essential features.
Put those requirements in order. If weight is a firm limit, use it to screen candidate models. If a genuine titanium shell defines the product, work through the size and configuration around that requirement. If a separate laptop pocket is essential, raise it when choosing the case layout. A material name alone can lead you to a shell you like that does not provide the function you need.
You can start before every detail is decided. For example: “We want a clean-looking metal business case with document storage and a controlled empty weight. We would also like to compare a titanium option.” That gives us more to work with than a request for the price of a premium metal suitcase. We can narrow the model choices and discuss the alternatives against the same brief.
Identify which part of the case must be metal
A titanium color, an aluminum frame, and a metal shell describe different things. When sharing a reference image, separate the color you like from the shell material and the frame construction. Send a color reference for a finish request; write a titanium-alloy shell into the brief when that is the material you require.
Our TT-001 titanium suitcase uses a 0.5 mm TC4 titanium-alloy shell. The wheels, locks, trolley handle, and lining have their own specifications, so review those parts separately when choosing the complete configuration.
Look at the individual model when comparing our aluminum and aluminum-magnesium ranges, too. Our manufacturer evaluation guide explains that both involve 5000-series aluminum-magnesium alloy, with differences in shell forming. TS-006 uses die-pressed panels; YCT-056 has a one-piece formed shell. The range names alone do not establish two entirely different metals or prove which finished case is lighter or more durable.
Keep three details together: the model, its shell material, and the construction or appearance you want. Check the specific grade and any material documents required for the project against that model. This gives sampling and quotation discussions a defined product to work from.
Assess shell performance, surface wear, and hardware separately
“Is this titanium case more durable than an aluminum case?” needs a more specific question. Are you concerned about dents in the panels, surface scratches, or the operation of the wheels, trolley, and locks? These involve different parts of the product.
For the shell, identify the grade, thickness, forming, and joining method. When comparing material properties, check the material condition and the specimen described. A raw-material data sheet does not establish the drop performance of a complete case. Appearance after impact, frame alignment, and latch operation need assessment on the relevant case under agreed conditions.
For appearance, review a physical example of the proposed finish. Discuss the wear your customers would accept and any abrasion-resistance claims you intend to make. A surface scuff and a distorted frame that prevents closure are different outcomes. Neither dismiss every mark as normal nor judge a case functional simply because the panels still look good.
For wheels and trolleys, look at the components and their attachment. A TC4 shell does not prove that the wheel assembly has passed an endurance test. Required performance and reports need to relate to the actual configuration. This also determines which statements your brand can support in its product description and which need further verification.
Compare finished weight under comparable conditions
These are the standard-build weights published on our product pages. Use them to make an initial shortlist.
| Model | Published size | Standard-build weight | What the figure helps you assess |
|---|---|---|---|
| TS-006 aluminum case | 20-inch version | 3.6 kg | Whether this existing aluminum model is close to your weight target |
| TT-001 titanium case | 20-inch version | 4.6 kg | Whether this titanium model’s standard weight suits your product brief |
| YCT-056 one-piece shell case | 18-inch version | 4.0 kg | Whether this compact case is a useful starting point; its size differs from the others |
These are model specifications, not a controlled experiment comparing metals. Even two cases labeled 20 inch still need their full outside dimensions, usable space, and configurations checked. Comparing the 18-inch YCT-056 with a 20-inch case cannot isolate a material-related weight difference.
For the proposed design, put the outside dimensions, usable space, lining, dividers, wheels, and trolley on the same specification sheet. Add the components you want to change, then check the assembled sample’s weight. Standard figures help you choose a starting point; a revised configuration needs its own confirmation.
If the sample exceeds your target, return to that sheet and identify which requirements can change. Discuss whether the interior needs every additional storage component, whether there are other component options to evaluate, or whether another case layout is more suitable. Do not treat thinner shell panels as an agreed weight-saving solution without reviewing the construction.
Compare how the samples roll, lift, and pack
After the specifications produce a shortlist, assess the samples in use. First familiarize yourself with the empty case’s opening and components, then compare under agreed loading conditions. When both cases must carry the same items, use the same packing set and record anything that does not fit or is awkward to reach. Note differences in case size or loading, too.
Assess rolling with the wheel assembly fitted to the case
On the same route and under comparable loading conditions, review straight travel, turns, and operation after stopping. Look for interference around the wheels, whether the trolley remains at its selected position, and how comfortably you operate its grip and button. Record the movement and location when a problem occurs; this is more useful than a comment that the case feels uncomfortable to pull.
This review helps select the sample configuration. It is not a wheel-endurance test. A case that rolls comfortably is not necessarily the one with the lower empty weight. Record the handling impression and measured weight separately.
Check the actual lifting action
Under the project’s agreed loading conditions, operate the top and side carry handles. Assess finger clearance, grip comfort, and whether the case sits at a practical distance from your body while lifting. If the intended customer often lifts the case off the ground, include that action in the review alongside rolling.
If the weight meets the brief but lifting remains awkward, continue with the handle and its position. If the complete weight does not suit the intended customer, revisit the model and configuration. Identifying the problem helps decide what to change next.
Pack the items the case is intended to carry
For a business case, try the intended documents, equipment, and organizers. Review the removal sequence, divider position, and closure after packing. Include protective sleeves and associated organizers when measuring equipment. Screen size alone does not establish whether the complete packing set fits.
For example, if documents should be accessible without releasing the clothing arrangement, operate the proposed opening and dividers that way. When the sequence is awkward, discuss the layout or another model. A different shell material does not directly solve an access problem.
Choose the opening, wheels, and trolley with the shell
Once the material meets your brief, look at how the complete case will be used. For document access, start with the opening and storage arrangement. For a bag carried on top, discuss the trolley, the bag’s sleeve, and the space above the case together. For a different wheel assembly, assess the wheel and its mounting area on the case.
Suppose you like one model’s shell but want the wide trolley from another. Combining the two photographs does not establish a finished design. The mounting positions, retracted arrangement, and relationship with the interior need review. Wheel and lock changes also need to be considered at their fixing points and in operation.
Keep the essential functions clear, then choose the closest existing model. If its opening, dimensions, and basic structure suit the brief, continue with color, branding, and the interior. If the shell outline or opening must change, list those changes so the design and tooling scope can be assessed separately.
Our luggage handle guide covers trolley styles and combinations in more detail. At this stage, decide what the trolley must do within the complete case before choosing its appearance.
Turn the appearance you like into sample requirements
A reference image starts the discussion, but “make it feel like this” leaves several decisions open. Do you like the panel lines, trolley proportions, corner shape, or the combination of a silver shell and black hardware? Mark those areas so we can discuss what to retain and what could be achieved another way.
For example, a silver shell, dark trolley, and restrained logo can first be considered together on the chosen model. Then specify the shell texture and sheen, hardware color, and logo size and position. Parts that look close in color may have different levels of gloss, so assess the combination using physical parts or a sample.
If both aluminum and titanium shells remain under consideration, agree on a finish proposal for each. Do not assume that one color reference will produce the same appearance on different materials and processes. Discuss a surface sample first where appropriate, then review the complete case. A swatch helps with color and texture; an assembled case shows how the finish works with the locks, handles, and overall shape.
Make revision comments specific, too. Instead of “make it more premium,” try “reduce the shell gloss, make the logo smaller and move it lower, and bring the carry-handle color closer to the trolley.” Each request gives the drawing and sample review something concrete to resolve.
You can also carry a brand detail across different models: coordinate the carry-handle outline, hardware color, and logo placement while retaining a structure appropriate to each case. A coordinated appearance does not require identical components on every model. Mark which design elements should match and which may vary with the case layout.
Align the configuration before comparing quotations
Material is part of a quotation. The case layout, finish, hardware, interior, packaging, and development work also define what is being priced. When comparing aluminum and titanium options, align the target dimensions, essential functions, order quantity, and packing arrangement as far as possible. Identify the differences that remain.
For example, one quote may use an existing shell and standard interior, while another includes a new shell outline, a specified trolley, and fitted storage. The price difference cannot all be attributed to the metal. Check what the unit price includes, whether design or tooling is separate, what the sample covers, and how packaging and delivery are priced.
A useful comparison request is: “With this size, opening, and interior requirement, which existing aluminum and titanium models could we start from? Which parts can stay, which need adjustment, and where do the quotations differ?” The answer helps you choose a proposal for your collection rather than compare two incomplete prices.
Leave an item marked “not yet comparable” when the corresponding specification is missing. Resolve it before deciding whether to sample both options. Our metal luggage cost guide explains the quotation scope in more detail.
If the quote exceeds budget, identify what caused the difference
Suppose the brief includes specified hardware, a special finish, a custom interior, and a gift box. List those options separately and decide which must stay. If additional development or configuration accounts for much of the difference, changing the metal may not resolve the full gap. If the actual requirement is an existing case with your colors and interior, compare that route before moving to a new shell.
Record the effect of each revision on price, function, appearance, and weight. You can then see what the saving removes and whether that trade changes the feature you intended to sell.
Three ways to start a metal luggage collection
Consider these three planning examples. Each starts with a different product requirement and shows what to compare next.
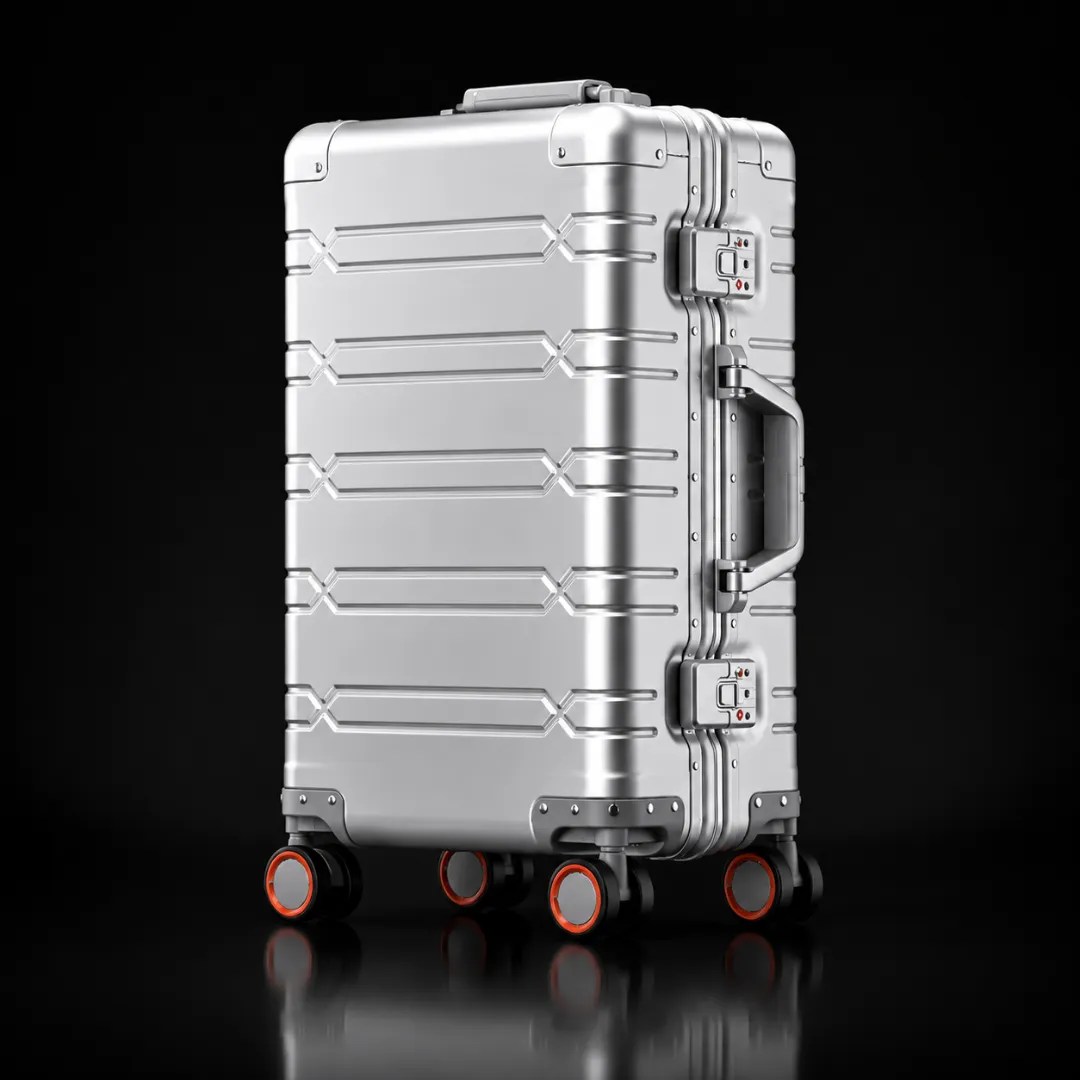
A coordinated collection in several sizes
If you want smaller and larger cases with coordinated styling, start by reviewing TS-006 in its existing 20-, 24-, and 28-inch sizes. Define the interior, colors, and quantities for each size, and check their finished specifications separately.
The useful starting point here is a model offered in the sizes your collection needs. If you also want a titanium option, review TT-001 in its 20- and 24-inch versions. A coordinated collection does not mean that the two shell types automatically share every outline, capacity, or component.
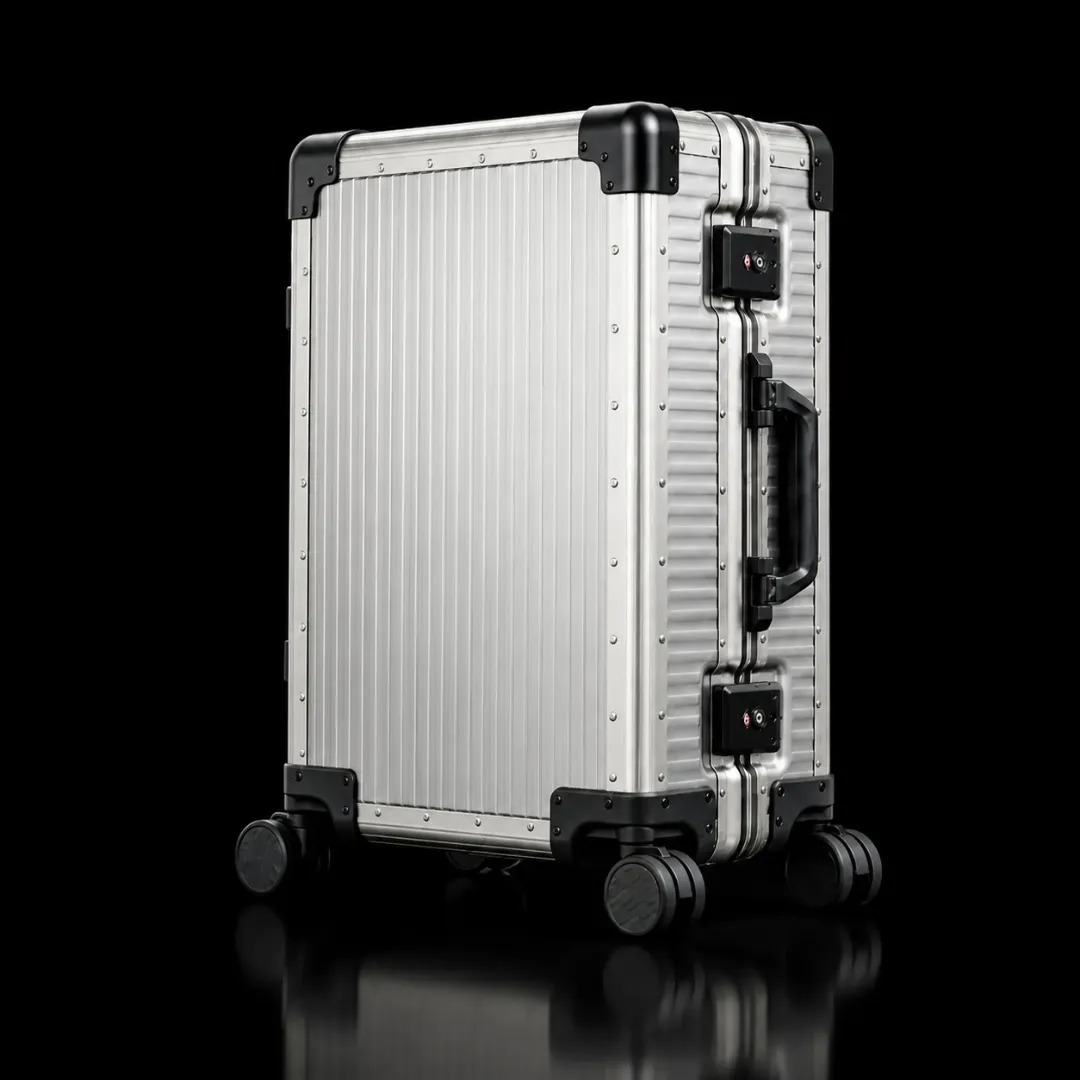
A product defined by a genuine titanium shell
When titanium alloy is a product requirement, start with TT-001 and compare its actual size, standard-build weight, and appearance with your brief. Decide what to retain and what should change for your brand.
If you also request a lower weight or a completely different shape, revisit the complete proposal. Discuss the dimensions and configuration, or evaluate another material as a separate route. Do not promise every specification of an existing aluminum case and assume a titanium-shell version will retain them all.
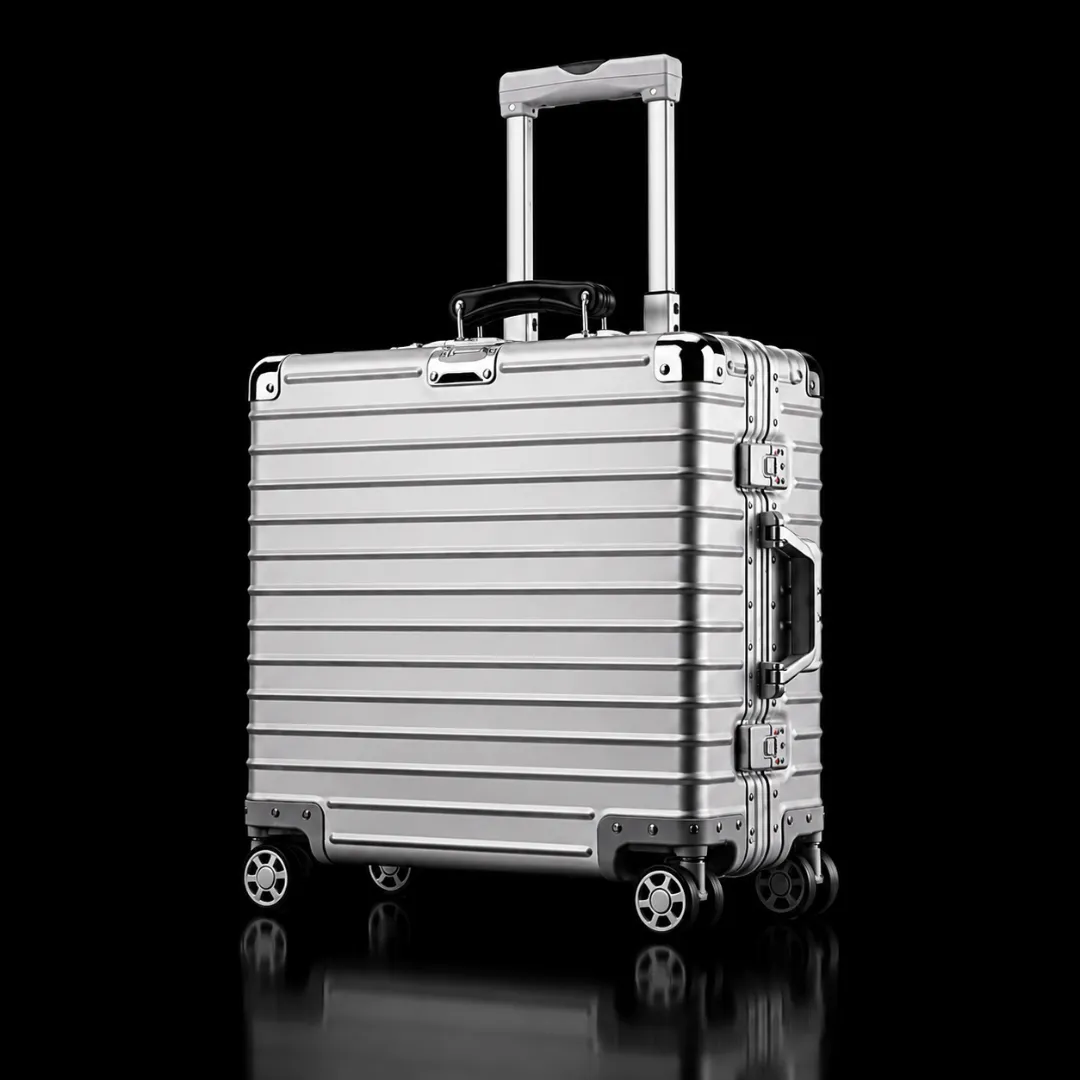
A compact business case with a continuous shell face
If you want a compact case and like the appearance of a one-piece formed shell, review YCT-056. Its existing shape and construction make it a candidate for that brief. The word magnesium in the range name does not make it the lightest option by itself.
Use the actual dimensions of the documents, equipment, and organizers to discuss the interior. Identify which items need separate pockets and which need dividers or straps, then review the arrangement around the trolley mounting area. If access or closure remains unsuitable, revise the layout or choose another model.
Design the lining and interior around what customers will pack
“Use our brand color and add some pockets” is a starting point. Continue with the fabric feel, pocket contents, divider opening direction, and how the packed items should stay in place. Lining material, storage layout, and retention solve different problems. Review them together inside the selected case.
Choose the fabric, then review a sewn pocket or divider
Compare physical swatches for color, texture, sheen, and softness. Record the fiber content, weave, thickness, or other specified fabric details. “Polyester lining” alone does not define the appearance and feel you want.
After choosing the swatch, review a sewn pocket or divider. Assess the completed edge with its zipper tape, binding, and fabric layers together. If you want a softer feel, identify whether the cloth, binding, or complete divider feels too stiff. If you want a thicker lining, check folding, packing, and closure on the sample as well.
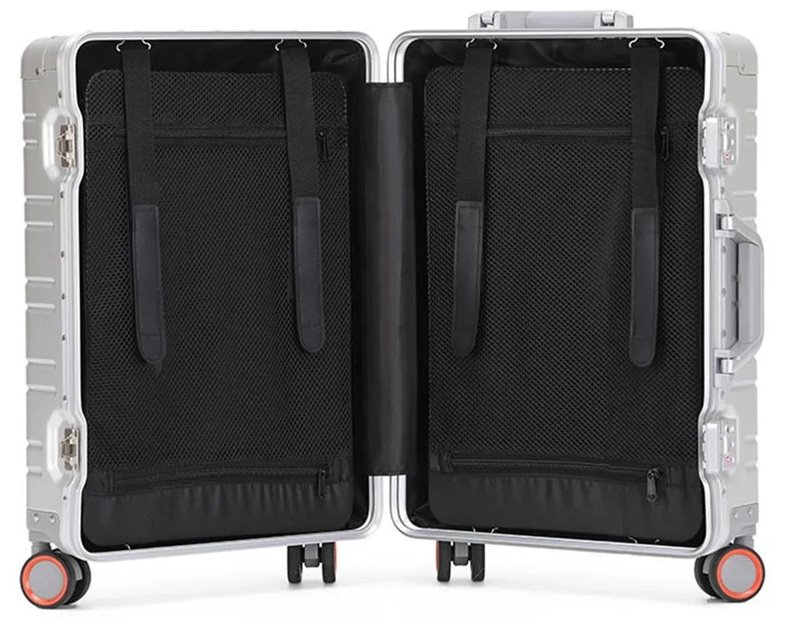
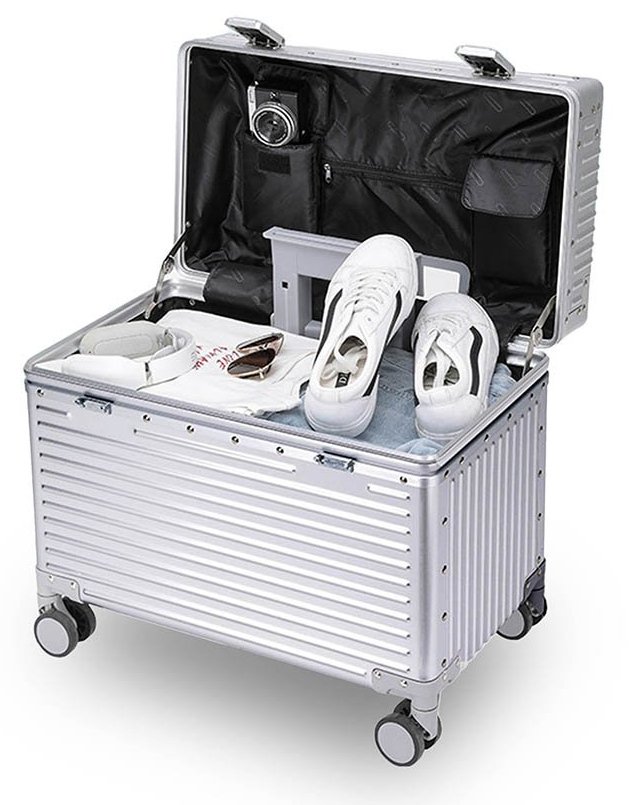
Give each divider, mesh pocket, and zipped pocket a purpose
List clothing, shoes, documents, equipment, and smaller belongings. Identify what should stay apart and what customers need to reach first. Starting with TS-006’s two packing sections, discuss what each side should carry, the area covered by each divider, and strap positions. Starting with TS-009’s main compartment and lid pockets, arrange larger items in the main space before assigning smaller items to lid storage.
Choose mesh and pocket closures around the contents and the action required. Draw each pocket opening on an interior photo and specify its contents and required dimensions. Then try opening the divider, removing documents, and closing the pocket. More pockets do not by themselves establish a useful layout. Check whether packed pockets obstruct another opening or interfere with closing the case.
Make straps and fitted inserts secure and easy to use
For clothing retention, show the strap positions and fastening direction. Pack the clothing and check that the buckle is reachable and the straps do not block pockets. For equipment or a gift set, provide dimensions for the items, their protective sleeves, and any packaging that must fit with them before discussing a fitted insert.
Review where each item sits, how it stays in place, where the customer can grip it for removal, and whether accessories have their own positions. Try the same items in the sample. If impact protection is also required, define the protective design and its verification separately. Fitting and retaining the contents does not establish transport protection.
Review the packed interior, closure, and each size
Pack the complete sample with the intended contents, zip the pockets, close the dividers, and fasten the straps before closing the case normally. Check the access sequence and look for lining, binding, or loose straps caught at the frame. For a shared interior style across several case sizes, check pocket dimensions, attachment positions, and packing results on each size.
Keep the swatch code, color reference, pocket and divider layout, and strap or insert requirements in the same configuration record. Use it when discussing the quotation, sample approval, and repeat orders. Our lining fabric and interior layout guide explains swatch comparison, sewn details, and the information needed for an interior quotation.
What to confirm from reference image to sample
Separate design preferences from firm requirements
Mark the shape, color, and components you like in the reference image. Add your size, weight, storage, and budget requirements. Explain the features you want in your own design, and provide your own logo artwork for the branding proposal.
Choose a starting model and list the changes
When an existing model is close to the brief, record what stays and what changes. For a new outline, use a sketch or dimensional requirements to discuss drawings and development scope. Explain what a different lock, wheel, or trolley should improve, rather than providing only a component name.
Use drawings for layout and samples for the physical result
Discuss logo placement and proportions on drawings first. Review color, grip, opening, storage, and component fit using the relevant physical parts or assembled sample. For a grip improvement, check the handle and button on the sample. For storage, try the items you intend it to carry.
Performance requirements need their own verification. A sample that feels comfortable to pull does not establish long-term durability, and material information does not replace whole-case testing. Describe the intended use, then discuss the test specimen, conditions, and results. Our luggage testing and reports guide explains how a report relates to the selected configuration.
Review each revision against the original request
For a logo move, wheel change, or divider revision, keep the original issue, requested change, and intended result together. Review changes to appearance or operation using appropriate physical evidence, and reconfirm affected costs and scheduling. Match the retained sample condition with the final configuration and revision record before discussing production. See our sample approval guide for the detailed review.
Plan repairs and repeat orders when selecting the first model
For a case you intend to sell over time, discuss replacement parts and responsibility for handling problems during selection. Identify wheels, trolleys, carry handles, and locks by the relevant model and version. Replacement feasibility, access to fixing points, and the parts required depend on the actual construction. Similar appearance does not establish interchangeability.
Discuss component replacement separately from damage to the shell or frame. A spare wheel set does not resolve a problem at a closing frame or shell joint. Ask to review relevant mounting areas during sample approval, then agree on the parts, quantities, costs, and supply arrangements required for the project. A general statement that metal luggage is repairable does not define those terms.
For repeat orders, identify the version to be continued: model, finish reference, logo files, hardware, and interior should correspond to the retained sample. If a component changes later, discuss its effect on appearance, installation, and previous verification before deciding what else can remain. Being able to identify and manage those changes matters when choosing a model for an ongoing collection.
What to send us before design starts
You do not need a complete engineering drawing to begin. Send the requirements you have decided, and identify the parts you would like help choosing.
| Information | What to include |
|---|---|
| Intended customer | Customer group, sales market, and intended selling price |
| Preferred starting point | Our model number or reference images with the relevant areas marked |
| Firm requirements | Shell material, outside dimensions, weight target, opening, and storage needs |
| Requested changes | Shell outline, color, logo, trolley, wheels, locks, or interior |
| Order plan | Proposed models, sizes, colors, quantities, delivery location, and timing |
| Approval requirements | Appearance references, operating requirements, and any specified tests or inspection criteria |
If the material is still open, use the same brief to discuss an aluminum proposal and a titanium proposal. Compare what each meets, what needs changing, and which results must be checked on the sample.
Start with our custom metal luggage options and send your brand preferences, intended use, and reference images. We can discuss the case and component combination, then develop those choices into a design and sample for review.
Tell us about your luggage project
Share your preferred model, quantity and customization requirements.